Thursday, March 14, 2013

HOW TO ADD FACEBOOK COMMENT BOX FOR BLOGGER

82 comments
Not all folks include a Google or web logger account during which they\'re going to use to discuss your blog. that\'s why some folks use a third party comment plug ins similar to Disqus and Intense discussion. However really folks area unit too lazy to discuss those commenting platform and that i am one in every of those. But, if you have got facebook comment box on your web log, possibilities of comments from your audience can increase as a result of virtually most are on facebook.

ADVANTAGE OF FACEBOOK COMMENT BOX


  • More convenient for guests. most of the people whereas water sport the online has their facebook account opened, having this comment box won\'t trouble them sign language up or getting into captcha\'s symbols after they wish to comment.
  • It boosts traffic. guests has the choice to post their comments on their profile and once somebody on their profile liked  it, it\'ll seem additionally on their profile page then on.
  • Threaded comments. Some blogs has no rib comments on their default blogger comment box. Mistreatment this plug-in can increase spoken language from your daily guests.
  • No spam comments.

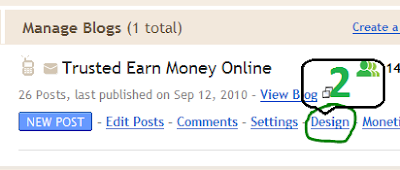
If you would like to cover your default comment box follow this


1. Login to your blogger account.
2. Than dashboard >>> Template >>> Edit HTML.
3. Don't forget to backup your template first.
4. Check the Expand Widget Templates box.
5. Now find out [ Click (Ctrl and F) Search for ] below code.


(some templates has more than 1 of this if you are using "read more").

6. Copy and paste the code below under the code. If you have 2 of these tags place it on the second of the same code.


7. Save template!

Now check on your web log and you may see a facebook comment box slightly below every of your posts. If you cannot see a comment box then your facebook account should are logged out, strive work in and see your facebook comment box, it'll currently seem.

Enjoy!

Tuesday, March 5, 2013

How To Add Related Post With Thumbnails to Blogger

12 comments
This is a great blogger hack from www.bloggerplugins.org .In this post I explain how to add this related post widget to blogger by hosting java script in blogger.It will help your template load faster.But If you don't want this method read the original article from here.
1.Login to your blogger dashboard--> layout- -> Edit HTML
2.Click on "Expand Widget Templates"
3.Scroll down to where you see </head> tag.
4.Copy below code and paste it just before </head> tag.
<!--Related Posts with thumbnails Scripts and Styles Start-->
<b:if cond='data:blog.pageType == &quot;item&quot;'>
<style type='text/css'>
#related-posts {
float:center;
text-transform:none;
height:100%;
min-height:100%;
padding-top:5px;
padding-left:5px;
}

#related-posts h2{
font-size: 1.6em;
font-weight: bold;
color: black;
font-family: Georgia, &#8220;Times New Roman&#8221;, Times, serif;
margin-bottom: 0.75em;
margin-top: 0em;
padding-top: 0em;
}
#related-posts a{
color:black;
}
#related-posts a:hover{
color:black;
}

#related-posts  a:hover {
background-color:#d4eaf2;
}
</style>
<script type='text/javascript'>
//<![CDATA[

//Script by Aneesh of www.bloggerplugins.org
//Released on August 19th August 2009
var relatedTitles = new Array();
var relatedTitlesNum = 0;
var relatedUrls = new Array();
var thumburl = new Array();
function related_results_labels_thumbs(json) {
for (var i = 0; i < json.feed.entry.length; i++) {
var entry = json.feed.entry[i];
relatedTitles[relatedTitlesNum] = entry.title.$t;
try
{thumburl[relatedTitlesNum]=entry.media$thumbnail.url;}


catch (error){
s=entry.content.$t;a=s.indexOf("<img");b=s.indexOf("src=\"",a);c=s.indexOf("\"",b+5);d=s.substr(b+5,c-b-5);if((a!=-1)&&(b!=-1)&&(c!=-1)&&(d!="")){
thumburl[relatedTitlesNum]=d;} else thumburl[relatedTitlesNum]='https://blogger.googleusercontent.com/img/b/R29vZ2xl/AVvXsEjMwnIPzWdzTSqmzG4OYytfEIkr4yv5yNUX-lKfMqeiW-zinNq9gRGWgwifHfLTP__GdP3sdWmne7feA76LWFUM6gBq5hVqIRh42uEhrJwp8B0cOCJS4RzPZe2kaKgaG1HavxyVBPt3nrk/s400/noimage.png';


}

if(relatedTitles[relatedTitlesNum].length>35) relatedTitles[relatedTitlesNum]=relatedTitles[relatedTitlesNum].substring(0, 35)+"...";
for (var k = 0; k < entry.link.length; k++) {
if (entry.link[k].rel == 'alternate') {
relatedUrls[relatedTitlesNum] = entry.link[k].href;
relatedTitlesNum++;


}
}
}
}
function removeRelatedDuplicates_thumbs() {
var tmp = new Array(0);
var tmp2 = new Array(0);
var tmp3 = new Array(0);
for(var i = 0; i < relatedUrls.length; i++) {
if(!contains_thumbs(tmp, relatedUrls[i]))
{
tmp.length += 1;
tmp[tmp.length - 1] = relatedUrls[i];
tmp2.length += 1;
tmp3.length += 1;
tmp2[tmp2.length - 1] = relatedTitles[i];
tmp3[tmp3.length - 1] = thumburl[i];
}
}
relatedTitles = tmp2;
relatedUrls = tmp;
thumburl=tmp3;


}

function contains_thumbs(a, e) {
for(var j = 0; j < a.length; j++) if (a[j]==e) return true;
return false;
}
function printRelatedLabels_thumbs() {
for(var i = 0; i < relatedUrls.length; i++)
{
if((relatedUrls[i]==currentposturl)||(!(relatedTitles[i])))
{
relatedUrls.splice(i,1);
relatedTitles.splice(i,1);
thumburl.splice(i,1);

}
}


var r = Math.floor((relatedTitles.length - 1) * Math.random());
var i = 0;

if(relatedTitles.length>0) document.write('<h2>'+relatedpoststitle+'</h2>');
document.write('<div style="clear: both;"/>');
while (i < relatedTitles.length && i < 20 && i<maxresults) {


document.write('<a style="text-decoration:none;padding:5px;float:left;');
if(i!=0) document.write('border-left:solid 0.5px #d4eaf2;"');
else document.write('"');
document.write(' href="' + relatedUrls[r] + '"><img style="width:72px;height:72px;border:0px;" src="'+thumburl[r]+'"/><br/><div style="width:72px;padding-left:3px;height:65px;border: 0pt none ; margin: 3px 0pt 0pt; padding: 0pt; font-style: normal; font-variant: normal; font-weight: normal; font-size: 12px; line-height: normal; font-size-adjust: none; font-stretch: normal;">'+relatedTitles[r]+'</div></a>');


if (r < relatedTitles.length - 1) {
r++;
} else {
r = 0;
}
i++;
}
document.write('</div>');

}

//]]>
</script>
</b:if>
<!--Related Posts with thumbnails Scripts and Styles End-->
5.Now scroll down to where you see below code:
<div class='post-footer-line post-footer-line-1'>
NOTE: If you can't find <div class='post-footer-line post-footer-line-1'> in your template,find <data:post.body> instead of it.
6.Copy below code and paste it just after above code.
<!-- Related Posts with Thumbnails Code Start-->
<b:if cond='data:blog.pageType == &quot;item&quot;'>
<div id='related-posts'>
<b:loop values='data:post.labels' var='label'>
<b:if cond='data:label.isLast != &quot;true&quot;'>
</b:if>
<b:if cond='data:blog.pageType == &quot;item&quot;'>
<script expr:src='&quot;/feeds/posts/default/-/&quot; + data:label.name + &quot;?alt=json-in-script&amp;callback=related_results_labels_thumbs&amp;max-results=6&quot;' type='text/javascript'/></b:if></b:loop><a href='http://www.bloggerplugins.org/2009/08/related-posts-thumbnails-blogger-widget.html' style='display:none;'>Related Posts with thumbnails for blogger</a><a href='http://www.bloggerplugins.org/' style='display:none;'>blogger tutorials</a>
<script type='text/javascript'>
var currentposturl=&quot;<data:post.url/>&quot;;
var maxresults=5;
var relatedpoststitle="Related Posts";
removeRelatedDuplicates_thumbs();
printRelatedLabels_thumbs();
</script>
</div><div style='clear:both'/>
</b:if>
<!-- Related Posts with Thumbnails Code End-->
Note: You can change 5 , Related Posts as your choice.
7.Now save your template and you are done.

How To Add Automatically Link To This Post Widget To Blogger

3 comments
Do you like to add "Link To This Post Widget" under your blog post?This will help you to increase your site's backlinks for better SEO.So if you interested to add this useful widget to your blogspot blog follow the simple steps below.
1.Log in to your dashboard--> layout- -> Edit HTML
2.Click on "Expand Widget Templates"
3.Scroll down to where you see this:
Link to this post widget for blogger
<data:post.body/>
  4.Copy below code and paste it immediately after the line <data:post.body/> .
<div style='border: 0px solid #646464; padding: 2px 2px; margin:2px 2px;background-color:#ffffff;font-size:11px;'>
<p>If you like this please Link Back to this article...</p>
<textarea cols='60' id='bloglinking' name='bloglinking' onclick='this.focus();this.select()' onfocus='this.select()' onmouseover='this.focus()' readonly='readonly' rows='2'>&lt;a href=&quot;<data:post.url/>&quot;&gt;<data:post.title/>&lt;/a&gt;</textarea><br/>
</div><br/>
Note:You can change colors,font,... if you like.
5.Click on "Save Templates" and now you are done.

Monday, March 4, 2013

How to Add or Remove Featured Article Slider in blogger themes?

7 comments
Most of us are using the blogger as platform to share your knowledge with others or earning some serious money with your knowledge. There are many in-build basic as well as modern templates in blogger but most often we use themes created by artists other than blogger. These artists make there themes more user friendly and stylish according to web 2.0. Many times in these themes we see a "Featured Article" name slider in the top most portion of posts section which specify the top most viewed post of your blog, but in some cases we don't want these slider in our blog and try to remove them. But as we all are not web designer and we don't know how to edit the HTML so these slider become a problem to us.


Step 1.
Go to your blogger account click on Template and Download your full template so as to make a backup. Then click on Edit Templates.

Step 2.
Start from the bottom n keep on looking the coding like this...


<!-- Featured Content Slider Started -->

<b:if cond='data:blog.pageType != &quot;static_page&quot;'>
<b:if cond='data:blog.pageType != &quot;item&quot;'>


<div class='featuredposts clearfix'>

<div class='fp-slides'>

<div class='fp-post'>
<div class='fp-thumbnail'><a href='featured-post-1-url-here'><img src='http://3.bp.blogspot.com/-viGE-reitBQ/TibVaXQyoMI/AAAAAAAAC1U/Vd8nXsp207E/s000/1.jpg'/></a></div>
<h3 class='fp-title'><a href='featured-post-1-url-here'>This is default featured post 1 title</a></h3>
<p>Go to Blogger edit html and find these sentences.Now replace these sentences with your own descriptions.PageList1</p>
</div>

<div class='fp-post'>
<div class='fp-thumbnail'><a href='featured-post-2-url-here'><img src='http://3.bp.blogspot.com/-yC2ItwN5lVg/TibVasa4PBI/AAAAAAAAC1Y/T-MusfHMvSM/s000/2.jpg'/></a></div>
<h3 class='fp-title'><a href='featured-post-2-url-here'>This is default featured post 2 title</a></h3>
<p>Go to Blogger edit html and find these sentences.Now replace these sentences with your own descriptions.PageList1</p>
</div>

<div class='fp-post'>
<div class='fp-thumbnail'><a href='featured-post-3-url-here'><img src='http://4.bp.blogspot.com/-SVxu3sQIBRI/TibVa6VtpMI/AAAAAAAAC1c/-A6Gjd7d4z0/s000/3.jpg'/></a></div>
<h3 class='fp-title'><a href='featured-post-3-url-here'>This is default featured post 3 title</a></h3>
<p>Go to Blogger edit html and find these sentences.Now replace these sentences with your own descriptions.PageList1</p>
</div>

<div class='fp-post'>
<div class='fp-thumbnail'><a href='featured-post-4-url-here'><img src='http://2.bp.blogspot.com/-g8Og-gFETa4/TibVbOrq1tI/AAAAAAAAC1g/815xr1cXIMA/s000/4.jpg'/></a></div>
<h3 class='fp-title'><a href='featured-post-4-url-here'>This is default featured post 4 title</a></h3>
<p>Go to Blogger edit html and find these sentences.Now replace these sentences with your own descriptions.PageList1</p>
</div>

<div class='fp-post'>
<div class='fp-thumbnail'><a href='featured-post-5-url-here'><img src='http://2.bp.blogspot.com/-p47uhAxrirI/TibVbuDPhwI/AAAAAAAAC1k/zLcwjH0017o/s000/5.jpg'/></a></div>
<h3 class='fp-title'><a href='featured-post-5-url-here'>This is default featured post 5 title</a></h3>
<p>Go to Blogger edit html and find these sentences.Now replace these sentences with your own descriptions.PageList1</p>
</div>

</div>


<div class='fp-nav clearfix'>
<span class='fp-pager'/>
<a class='fp-next' href='#fp-next'/>
<a class='fp-prev' href='#fp-prev'/>
</div>
</div>


</b:if></b:if>

<!-- Featured Content Slider End -->
Content Slider End --&amp;amp;gt;
Step 3.
Select all these coding(or similar to it) and just delete it or edit it to customize your slider. And if you remove it then your blog will look like this


Step 4.
First click on Preview to verify your editing and if you are totally satisfied click on Save Template.

How to Change Blogger Template in New Blogger Interface

1 comments
Some might use blogger old interface. But the old blogger interface will not be available in future. That means old interface retires.
So I write about ‘How to Change Blogger Template in New Blogger Interface’. Below are the step by step procedures to change the blogger template.
1. First download a new blogger template. Lots of templates are available in internet for free. Search for free blogger templates. Download a template which you want. The blogger template you downloaded will be an xml file or text file.
2. Login to blogger.You will get your list of blogs
3. Then go to ‘template’ section as given in below image.
Blogger-Template-Changing
4. Then click ‘Backup/restore’ button which will be at the right top corner.
blogger-backup and restore
5. A lightbox window will open with two options. First one ‘download full template’ is for making a backup of current template and second one ‘upload’ is for choosing a template from your computer and upload it to change the blogger theme.
If you want, you can take backup.
To change the template first click ‘choose’ and browse for the template you download and then click ‘upload’.
blogger-template-upload
That’s all. Your template will be changed.
6. If you want to edit the template you uploaded click ‘edit html’ button.
Blogger-edit-html
A lightbox window will open and alert you. Click ‘proceed’ button.
blogger-edit-html-proceed
7. After clicking ‘proceed’ button you can see the html code of your new blog template. Check the ‘expand widget templates’ option. blogger-expand-widget
8. Edit styles of widgets, body, text etc., And click ‘save template’ button.
blogger-save-template
Then click ‘close’ icon.
9. If you want to add gadgets, go to ‘layout’ option.
blogger-layout
10. Click ‘add a gadget’ to add a gadget from a list of available gadgets. Arrange them by drag and drop. Don’t forget to save the changes by clicking ‘save arrangement’. blooger-add-gadgets
That’s all. View your blog to see the changes.

One important thing to do:

One thing you must do is backup your blog html gadgets you added in old template and delete them before uploading your new template. After changing template restore them.
Why?
If you don’t delete them, those html codes may be hidden or vanished from your template ( I don’t know why. But sometimes it happens). But they may run. You can’t stop them working. I personally experienced it. I had a blog. Also I had added a gadget having a code for pop-up advertisements.
When I uploaded the template that html code gadget was vanished. I could not find it. But the advertisements had been showing on my blog. Later I realized pop-up adverts are irritating adverts. Also that advertising network suspended my account. But I could not remove their code from my blog since I could not find it. Adverts had been showing on my blog. So I deleted that blog and started this blog.
The problem with template Uploader may not come or template Uploader may not create the problem. But for safer side backup your gadgets codes, delete and restore after changing your template.

Wednesday, October 5, 2011

Blogspot How to: Add Adsense Below Post Titles

13 comments

How to Add Adsense Below Post Titles in Blogspot Blogs

Google Adsense is the most popular ad network on the planet. A lot of Blogger users also use it. It's an endless discussion where to place these ads on your blog for maximum exposure. The best ad places are around the header or above the posts or below the post titles. You can easily add adsense in your sidebar as a gadget. But Blogger doesn't allows us to directly place the ads below post titles. The ads below post titles have proven to be one of the most successful money making positions. So, what are you waiting for? Follow this tutorial to add your Adsense ads below post titles.

Please Note: I'm assuming that you're using the new Adsense interface.

Steps!

  1. Log in to your Google Adsense account by going to https://www.google.com/adsense/
  2. Go to My ads tab and open Ad units from the left side by expanding Content link.[View Screenshot for Help]
  3. Click new ad unit to create a new ad.[View Screenshot for Help]
  4. Select the size, type and color of your ad. For best results chose either 300x250 medium or 336x250 large rectangle.[View Screenshot for Help]
  5. Give your ad a remember-able name and ad a custom channel to track the ad performance. If you don't know anything about channels then leave that option.
  6. After filling required information, click save and get code button at the bottom of the page.[View Screenshot for Help]
  7. A pop-up window will appear with the ad code. Copy that code.[View Screenshot for Help]
  8. Before pasting the ad code in Blogger, we must make it compatible with Blogger format. So go tohttp://www.hacktrix.com/adsense-code-converter/ paste the ad code and convert it. You'll find the converted ad code in the bottom box there. Copy the converted ad code.
  9. Open your Blogger account and go to Design then Edit HTML tab and check Expand Widget Templates option.
  10. Press Ctrl + f & find <data:post.body/> you'll see some code like this:
    <div class='post-body entry-content'>
<data:post.body/>
<div style='clear: both;'/> <!-- clear for photos floats -->
</div>
  1. Paste the converted ad code just before the above code. The result would look something like this:
<script type="text/javascript"><!--
google_ad_client = "ca-pub-xxxxxxxxxxxxxxx";
/* my ads */
google_ad_slot = "xxxxxxxxxx";
google_ad_width = 300;
google_ad_height = 250;
//-->
</script>
<script type="text/javascript"
src="http://pagead2.googlesyndication.com/pagead/show_ads.js">
</script>
<div class='post-body entry-content'>
<data:post.body/>
<div style='clear: both;'/> <!-- clear for photos floats -->
</div>
  1. Click the PREVIEW button to see the result. Thought you might not see ads below post titles instantly because sometimes Adsense ads take some time to display.
  2. After that save your template by clicking the SAVE TEMPLATE button.

Tip: Make Ads Appear Only on Post Pages


Usually, users don't like to see too many ads on a single page. So, we can hide the ads under post titles on main page. These ads will appear only when users will click the post title and go to the post page. To do that follow the steps above but after step 8 you have the converted ad code. Ad some more code in that converted code so that it should look like this:

<b:if cond='data:blog.pageType == &quot;item&quot;'><script type="text/javascript"><!--
google_ad_client = "ca-pub-xxxxxxxxxxxxxxx";
/* my ads */
google_ad_slot = "xxxxxxxxxx";
google_ad_width = 300;
google_ad_height = 250;
//-->
</script>
<script type="text/javascript"
src="http://pagead2.googlesyndication.com/pagead/show_ads.js">
</script></b:if>


1.) If you want to show your Google Adsense ad below post tile to blogger in the left side then copy the below Code 1.1,
Code 1.1

<div style="float: left; margin: 10px 10px 10px 0;">
YOUR ADSENSE CODE HERE
</div>
 OR

2.) If you want to show your Google Adsense ad below post tile to blogger in the right side then copy the below Code 1.2,

Code 1.2

<div style="float: right; margin: 10px 0px 10px 10px;">
YOUR ADSENSE CODE HERE
</div>
OR

3.) If you want to show your Google Adsense ad below post tile to blogger in the center then copy the below Code 1.3,

Code 1.3

<div style="text-align: center; margin: 10px 10px 10px 0;">
YOUR ADSENSE CODE HERE
</div>

What I did here is that I've added an if condition to make the ads appear only on post pages. After that, follow the steps above to complete the tutorial.

How To Place Adsense Below Post Title

2 comments


Why below post title? Because it is the position with the highest CTR (click-through rate). In other words the ad placed there will bring the most money.
According to the Adsense ads positioning guideline published by Google, the best performing Adsense ad position is above the primary content i.e. above the blog post. This is illustrated by the heat map on the right.
Placing an ad below post title (above post content) is a not at all difficult. All you have to do is create an ad unit on Google Adsense website, get the code and add it to the specified location in your blog template.
(You can’t use Blogger’s Inline Adsense or Adsense gadget because it doesn’t have the option to add an ad under post title).
Here we go,

1. Preparing Adsense ad code

  1. Log in to Google Adsense (opens in  tab/window) to create a new ad unit.
  2. For best results choose wide ad size -either 300x250 Medium Rectangle or 336x250 Large Rectangle format. Make sure you assign a new ad channel to it for performance monitoring purposes.
  3. When the setup is complete, you will be given a code.
  4. Run the code through an HTML escape tool to escape special characters in the code. The ad won’t appear if you use the original unescaped ad code.
  5. Copy the escaped code.

2. Adding ad code to the template

  1. Go to Dashboard > Design > Edit HTML.
  2. Tick the  Expand Widget Templates check box on top right of the HTML window.
  3. Look for the following line in your HTML code:
    <data:post.body/> 
  4. Paste the escaped ad code right above the line, like so:
    <b:if cond='data:blog.pageType == &quot;item&quot;'>
     PLACE AD CODE HERE
    </b:if>

    the conditional tag in lines 1 and 3 will make the ad appear only on post pages. If you want the ad to appear on all pages, just remove the lines.
  5. Save and view your blog.

3. Monitor ad performance

Make sure you monitor the ad performance. Don’t automatically assume it succeeds in increasing CTR without seeing the actual results.
No two blogs are the same, what works on most blogs may or may not work on yours. If you don’t see positive changes, test again with different ad types, formats, colors and/or placements.
Enjoy!

Saturday, October 1, 2011

how to remove blogger navbar or hide navigation bar in blogger

4 comments

Remove or Hide blogger navbar or blogger navigation bar from your blogger blog.


how to hide or remove blogger navbar


Blogger navbar or blogger navigation bar basically navigate your visitors to random blogs and have search box so your visitors can search any topic in blogger navbar or blogger navigation bar and easily left your blog by blogger navbar and reach to others blogs ( is it alright for you! ) it can not be good for you because they are your visitors who navigates through blogger navigation bar and also your visitors can marks spam your blogger blog through blogger navbar or blogger navigation bar. So it is a good idea for remove or hide blogger navbar ( navigation bar ) from your blogger blog and also the navigation bar in to your blogger blog look like spoil and it gives you an unprofessional look of your blogger blog so how to hide blogger navbar ( navigation bar ) or how to remove blogger navigation bar, is given below.


Sign in to your blogger dashboard :


blogger blogspot blogs tips


-- > Click on Design ::


blogger tips and tricks for navigation bar


-- > Click on Edit HTML ::


how to remove navbar bar in blogger


-- > [Don't forget to backup your template] Check box in " Expand Widget Templates " and find the code (using ctrl+F) ]]></b:skin> just before ]]></b:skin> code paste the below code ::


#navbar {
height: 0px;
visibility: hidden;
display: none;
}


See in picture :


hide navigation bar in blogger


You done !

Followers

Blogumulus by Roy Tanck and Amanda Fazani
Free Blogger Tips, Hacks, Widgets, Templates and more