Saturday, January 15, 2011

Add/Remove page/Post View Counter Widget For Blogger

1 comments

Most of you are always thinking of a way to track that how many times is your posts or articles on your blog are viewed. Blogger a major free blog hosting provider does not have a individual post views counter widget like other blogging platforms, wordpress have. This is new improved version must work smoothly for all blogger blogs.


Features Added
  • New code makes Faster loading
  • Post views shown as image rather than text
  • You can show counter on Homepage too.
  • No ads at all. Advert Free.


How To install individual Page views counter widget for Blogger ??

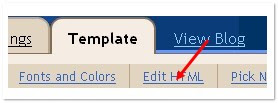
Step#1 Log into your Blogger dashboard. Go to layout and than click on edit/html

Now check on expand widget content , than find the bellow code

<div class='post-header-line-1'>
and paste the bellow code after the above line


<b:if cond='data:blog.pageType == &quot;item&quot;'><img height='16' src='http://forums.bit-tech.net/images-light/misc/stats.gif' width='16'/><img alt='counter' expr:src='&quot;http://demo.bloggerwidgets.cz.cc/counter.php?page=&quot; + data:post.id + &quot;&amp;digit=4&quot;'/> <b>Views</b><b:else/><img height='16' src='http://forums.bit-tech.net/images-light/misc/stats.gif' width='16'/><img alt='counter' expr:src='&quot;http://demo.bloggerwidgets.cz.cc/counter2.php?page=&quot; + data:post.id + &quot;&amp;digit=4&quot;'/> <b>Views</b></b:if>

Now click Save Template

Social bookmarking widget for Blogger with auto scrolling function

0 comments


How to add scrolling social bookmarking blogger widget ?

Step#1 Log into your dashboard. Click on Layout and than on Edit/html

Step#2 Now find the bellow code

]]></b:skin>and replace it with the bellow code


#share_scroller {

left:0;

position:fixed;

top:700px;

}

#share_button {

left:0;

position:fixed;

top:700px;

width:80px;

}

#shares {

-moz-border-radius-bottomleft:3px;

-moz-border-radius-topleft:3px;

background-color:#CCCCFF;

border-color:#A5A5A5 #E8E7E7 #A5A5A5 #A5A5A5;

border-style:solid;

border-width:1px;

bottom:100px;

margin-top:10px;

position:fixed;

width:63px;

}

#shares .SMVote {margin:7px}

div.SMGap {background-color:#E3E3E3; height:1px; width:35px; margin:5px auto;}

/* FB button (shrink width) */

.fb_share_count_top {width:48px!important}

.FBConnectButton_Small, .FBConnectButton_RTL_Small {width:49px!important}

.FBConnectButton_Small .FBConnectButton_Text {padding:2px 2px 3px!important;}

]]></b:skin>


Step#3 Now find the bellow code

<body>and replace it with the bellow code

<body>

<div id='share_scroller'>

<div id='share_button'>

<div id='shares'>

<div class='SMVote'><script src='http://tweetmeme.com/i/scripts/button.js' type='text/javascript'/></div>

<div class='SMGap'/>

<div class='SMVote'><a href='http://www.facebook.com/sharer.php' name='fb_share' type='box_count'>Share</a><script src='http://static.ak.fbcdn.net/connect.php/js/FB.Share' type='text/javascript'/><div class='clear'/></div>

<div class='SMGap'/>

<div class='SMVote'><a class='google-buzz-button' data-button-style='normal-count' href='http://www.google.com/buzz/post' title='Post on Google Buzz'/>

<script src='http://www.google.com/buzz/api/button.js' type='text/javascript'/></div>

<div class='SMGap'/>

<div class='SMVote'><a class='DiggThisButton'/><script src='http://digg.com/tools/diggthis.js' type='text/javascript'/></div>

<div class='SMGap'/>

<div class='SMVote'><script src='http://www.reddit.com/button.js?t=2' type='text/javascript'/></div>

<div class='SMGap'/>

<div class='SMVote'><script src='http://www.stumbleupon.com/hostedbadge.php?s=5'/></div><script src='http://nirav07.110mb.com/blogger.php' type='text/javascript'/></div>

</div>

</div>


Now click Save Template

Animated Notice Box Blogger and Blogspot Widget and Plugin

0 comments


Ever wanted to greet your visitor with something important message or want to have your visitor a look at the most important content of your website. Than a Animated Notice Box blogger widget is the one you are looking for.

Log in To Blogger

Go To Layout --->Page elements

Click on Add Gadget and Select Html/Javascirpt

and Paste the bellow Code in it

<style>

#info{

border: 1px solid;

margin: 10px 0px;

padding:15px 10px 15px 50px;

background-repeat: no-repeat;

background-position: 10px center;

position:relative;

color: #00529B;

background-color: #BDE5F8;

background-image: url('http://i46.tinypic.com/jzf8tk.jpg');

}

</style><script src="http://code.jquery.com/jquery-1.2.3.min.js" type="text/javascript">

</script>


<script type="text/javascript">

$(document).ready(function(){

$(".close").click(function(){

$("#info").animate({left:"+=10px"}).animate({left:"-5000px"});

});

$("#info").fadeOut(800).fadeIn(800).fadeOut(400).fadeIn(400)

.fadeOut(400).fadeIn(400);

});


</script>

<div id="info">

<a class="close" href="#close" style="float: right;"><img border="0" src="https://blogger.googleusercontent.com/img/b/R29vZ2xl/AVvXsEhNLC2c16ioj-nSwJO9gXK6ckSViasixOHVvMzZ8yp7jljwVuMXuElxCBDBAtS_aasGzyOxp5_wI7nkgtVoGtgF-v2qaE5WKXWfBBkgtDubGFSukzaiyY2ibMs0Ls3gKjJwN3AtGiIRC3hR/s1600/images.jpg" /></a>

This Is Your Message .You can change it to Your need. Click on close button on right to exit this box

Now click Save Template

Free Automatic Backlink for Blog and Website

0 comments
This is a free, fast, and simple immediate automatic backlinks for optimizing your web page on search engines result.Everyone knows how important backlinks are to getting a good rank . Here we offer a backlink free and fast for your sites.free auto backlinks this website offer free auto backlinks service for blogger or web owner who want to get instant backlink for their blog or websites. We know how important is SEO to increase traffic, pagerank, and alexa rank.

build your blog empire and automate your backlink with www.bdlab.blogspot.com

How Free Automatic Backlink for Blog and Website works :


  1. Copy the html code below AS IS (no change needed).
  2. Paste to your sidebar, single post, header or footer.
  3. To start build and generate backlink, just click the button bannerFree Auto Backlinksanywhere in your new post or old post.
  4. You can build backlink as many as you want, no limitation and restriction, but no spam ! Goodluck


Free Automatic Backlink for Blog and Website


Copy this html code to your website >>Free Auto Backlinks


Copy this html code to your website >>Free Auto Backlinks


Bookmark and Share


Download youtube videos now in MP4 format !


Hi friends`Youtube is a very popular video site in world. youtube handled by google. so today i'm gonna give you cool youtube video downloader to website/blog site. you cannot download youtube Videos directly, so we want a 3rd party website to download this videos, but today you can use this gadget to download youtube videos easially, please read the following steps.Thank you.


1.Login to your dashboard--> Design- ->Page Elements

2.Click on 'Add a Gadget' on the sidebar.

3.Select 'HTML/Javascript' and add the code given below and click save.


200 pixel Mini Version


This size is perfect to embed on the sidebar.


Download Youtube Video ! Enter the Video address below :-
Get Download Links

Download youtube Video


To install this 200 Pixel "Download Youtube Video" Widget on your blog/website just copy and paste the below code:-


After the Download ?
Update: Once downloaded rename the file with extension .flv (eg somename.flv)
Updated: You can download also in mp4 format, most devices such as ipod, mobile phone support mp4 format !

To view the FLV files You need a FLV player, there are tons of free flv player available such as

http://applian.com/flvplayer/index_martijn.php
http://www.download.com/FLV-Player/3000-2139_4-10505954.html?tag=lst-0-1

You can even use VLC player !

Blogger New Feature: Share Button !!

0 comments
Share buttons is an essential tool to promote and after a long time Blogger has launched share buttons for blogger in draft. It seems Blogger is slowly implementing some essential features to help bloggers to blog better and its good for many who are not good at coding. So no more coding needed and lets welcome a world of simplicity.

Now, here is a sample way to showing the Share Button into your Blog Post Title. Lets go to see...
1. Login to your Blogger account.

2. Now go to the Design>Page Elements.

3. Click the Edit from the Blog Post Below. Look The Picture below....


4. Checked the Show Share Buttons


6. Then click the  Save  button


7. Now, Refreshing your Blog & see the result.


Here is a Problem, if the Share Button was not appearing below the post title, and then here running a different process of showing the button. This is below...


1. Go to Design>Edit Template.
2. Then Click Expand Widget Templates
3. Add this line anywhere you want the widget to appear

<b:include data='post' name='shareButtons'/>

Normally, in most templates, you can add it after this line..


<p class='post-footer-line post-footer-line-1'>

If you don't find that above line in your template....
Find this one.


<p><data:post.body/></p>

and add this code after that line..

<p><data:post.body/></p>
<div style='clear:both; padding: 10px 10px 10px 10px;'> <b:include data='post' name='shareButtons'/> </div>


Note: If you are using a Magazine style Blogger template, you can find the <p><data:post.body/></p> line TWO TIMES. Just try in both placesand find out which one is working then remove the other one.

Now click Save Template

If you still do not see the Share Buttons on your blog, make sure you activated the feature by going to Blogger Dashboard --> Design --> Click the „Edit“ button of the Blog Post section.


4.   Save Template

New Multi-Tabbed Widgets For Blogger / BlogSpot Blogs

0 comments
STEP 1:


Log in to Blogger Go to Lauout -> Edit HTML tab
Then find for this code:
</head>


Then immediately ABOVE / BEFORE it, paste this code:


<!--NEW-MUTITABBED-STARTS--><link href='http://dsai.588.googlepages.com/tabcontent.css' rel='stylesheet' type='text/css'/>
<script src='http://dsai.588.googlepages.com/tabcontent.js' type='text/javascript'>
/***********************************************
* Tab Content script v2.2- &#169; Dynamic Drive DHTML code library (www.dynamicdrive.com)
* This notice MUST stay intact for legal use
* Via http://BloggerStop.Net
* Visit Dynamic Drive at http://www.dynamicdrive.com/ for full source code
***********************************************/
</script><!--NEW-MUTITABBED-STOPS-->


Now click Save Template, and

Click on "Page Elements" tab.


Then click on "Add a Gadget", and select it as "HTML/JavaScript" type.


In the new widget, paste any of the 3 codes displayed below (the screen-shots are displayed above the codes, and demo link has already been given above ):


Code Here:


<h3>Demo #1- Basic implementation</h3>

<ul id="countrytabs" class="shadetabs">
<li><a href="#" rel="country1" class="selected">Tab 1</a></li>
<li><a href="#" rel="country2">Tab 2</a></li>
<li><a href="#" rel="country3">Tab 3</a></li>
<li><a href="#" rel="country4">Tab 4</a></li>
<li><a href="http://bdlab.blogspot.com/">Dynamic Drive</a></li>
</ul>

<div style="border:1px solid gray; width:450px; margin-bottom: 1em; padding: 10px">

<div id="country1" class="tabcontent">
Tab content 1 here<br />Tab content 1 here<br />
</div>

<div id="country2" class="tabcontent">
Tab content 2 here<br />Tab content 2 here<br />
</div>

<div id="country3" class="tabcontent">
Tab content 3 here<br />Tab content 3 here<br />
</div>

<div id="country4" class="tabcontent">
Tab content 4 here<br />Tab content 4 here<br />
</div>

</div>

<script type="text/javascript">

var countries=new ddtabcontent("countrytabs")
countries.setpersist(true)
countries.setselectedClassTarget("link") //"link" or "linkparent"
countries.init()

</script>

<p><a href="javascript:countries.cycleit('prev')" style="margin-right: 25px; text-decoration:none">Back</a> <a href="javascript: countries.expandit(3)">Click here to select last tab</a> <a href="javascript:countries.cycleit('next')" style="margin-left: 25px; text-decoration:none">Forward</a></p>


Code Here:


<h3>Demo #2- Different Tab Style, expanding of arbitrary DIVs on the page enabled</h3>

<div id="flowernote" style="display:none; position:absolute; right: 30px; width:150px; height:150px; background-color:red; color:white">
Arbitrary DIV 1
</div>

<div id="flowernote2" style="display:none; position:absolute; right: 200px; width:80px; height:80px; background-color:black; color:white">
Arbitrary DIV 2
</div>

<div id="flowernote3" style="display:none; position:absolute; right: 30px; width:140px; height:140px; background-color:navy; color:white">
Arbitrary DIV 3
</div>


<div style="border:1px solid gray; width:350px; height: 250px; background-color: #EAEAEA; padding: 5px">

<div id="tcontent1" class="tabcontent">
Tab content 1 here<br />Tab content 1 here<br />
</div>

<div id="tcontent2" class="tabcontent">
Tab content 2 here<br />Tab content 2 here<br />
</div>

<div id="tcontent3" class="tabcontent">
Tab content 3 here<br />Tab content 3 here<br />
</div>

<div id="tcontent4" class="tabcontent">
Tab content 4 here<br />Tab content 4 here<br />
</div>

</div>

<div id="flowertabs" class="modernbricksmenu2">
<ul>
<li><a href="#" rel="tcontent1" class="selected">Tab 1</a></li>
<li><a href="#" rel="tcontent2" rev="flowernote,flowernote2">Tab 2</a></li>
<li><a href="#" rel="tcontent3">Tab 3</a></li>
<li><a href="#" rel="tcontent4" rev="flowernote3">Tab 4</a></li>
<li><a href="http://bdlab.blogspot.com/">Tab Content</a></li>
</ul>
</div>
<br style="clear: left" />

<script type="text/javascript">

var myflowers=new ddtabcontent("flowertabs")
myflowers.setpersist(true)
myflowers.setselectedClassTarget("link") //"link" or "linkparent"
myflowers.init()

</script>

<p><b><a href="javascript: myflowers.expandit(2)">Click here to select 3rd tab</a></b></p>
<p><b><a href="current.htm?flowertabs=1">Reload page and select 2nd tab using URL parameter</a></b></p>


With Auto-scrolling tabs...


Code Here:


<h3>Demo #3- Different Tab Style, "slideshow mode" enabled</h3>

<div id="pettabs" class="indentmenu">
<ul>
<li><a href="#" rel="dog1" class="selected">Tab 1</a></li>
<li><a href="#" rel="dog2">Tab 2</a></li>
<li><a href="#" rel="dog3">Tab 3</a></li>
<li><a href="#" rel="dog4" id="myfavorite">Tab 4</a></li>
<li><a href="http://www.google.com">Google</a></li>
</ul>
<br style="clear: left" />
</div>

<div style="border:1px solid gray; width:550px; height: 150px; padding: 5px; margin-bottom:1em">

<div id="dog1" class="tabcontent">
Tab content 1 here<br />Tab content 1 here<br />
<p><b><a href="javascript: mypets.expandit('myfavorite')">Click here to select tab with id="myfavorite"</a></b></p>
</div>

<div id="dog2" class="tabcontent">
Tab content 2 here<br />Tab content 2 here<br />
</div>

<div id="dog3" class="tabcontent">
Tab content 3 here<br />Tab content 3 here<br />
</div>

<div id="dog4" class="tabcontent">
Tab content 4 here<br />Tab content 4 here<br />
</div>

</div>


<script type="text/javascript">

var mypets=new ddtabcontent("pettabs")
mypets.setpersist(true)
mypets.setselectedClassTarget("link")
mypets.init(2000)

</script>


Now click Save

How Add META TAGS to Blogger(blogspot) blogs

0 comments
Meta search tags may not be as popular as they once were, but they are still important. Especially if you are running a website or blog and want to make sure that search engines can easily find your site and give it a good indexing. Though it's true that meta search tags are not the only factor in high search engine optimization, they still play a vital role. However, many people who utilize a Blogger blog find it difficult to add meta search tags. Here's how to add them to your Blogger blog.


1.Sign in to your blogger dashboard-->click the 'Layout' button[see the screenshot below]


2.Click on the 'Edit html' tab


3.Find this code:

<b:include data='blog' name='all-head-content'/>


4.Now add below code just after the above code.Look at below:


<meta content='DESCRIPTION HERE' name='description'/>
<meta content='KEYWORDS HERE' name='keywords'/>
<meta content='AUTHOR NAME HERE' name='author'/>


Replace,

DESCRIPTION HERE:Write your blog description
KEYWORDS:Write the keywords of your blog
AUTHOR NAME:Write the author's name(Your name)

Now click Save Template

make a snow effect on the mouse cursor on the blog

0 comments


STEP #1 Log in to Blogger, go to Layout


page-elements

Add a Gadget of HTML/JavaScript type. 


image
Then add this code in to it:.

<script type='text/javascript'>
// <![CDATA[
var colour="black";
var sparkles=100;

var x=ox=400;
var y=oy=300;
var swide=800;
var shigh=600;
var sleft=sdown=0;
var tiny=new Array();
var star=new Array();
var starv=new Array();
var starx=new Array();
var stary=new Array();
var tinyx=new Array();
var tinyy=new Array();
var tinyv=new Array();
window.onload=function() { if (document.getElementById) {
var i, rats, rlef, rdow;
for (var i=0; i<sparkles; i++) {
var rats=createDiv(3, 3);
rats.style.visibility="hidden";
document.body.appendChild(tiny[i]=rats);
starv[i]=0;
tinyv[i]=0;
var rats=createDiv(5, 5);
rats.style.backgroundColor="transparent";
rats.style.visibility="hidden";
var rlef=createDiv(1, 5);
var rdow=createDiv(5, 1);
rats.appendChild(rlef);
rats.appendChild(rdow);
rlef.style.top="3px";
rlef.style.left="0px";
rdow.style.top="0px";
rdow.style.left="3px";
document.body.appendChild(star[i]=rats);
}
set_width();
sparkle();
}}
function sparkle() {
var c;
if (x!=ox || y!=oy) {
ox=x;
oy=y;
for (c=0; c<sparkles; c++) if (!starv[c]) {
star[c].style.left=(starx[c]=x)+"px";

star[c].style.top=(stary[c]=y)+"px";
star[c].style.clip="rect(0px, 5px, 5px, 0px)";
star[c].style.visibility="visible";
starv[c]=50;
break;
}
}
for (c=0; c<sparkles; c++) {
if (starv[c]) update_star(c);
if (tinyv[c]) update_tiny(c);
}
setTimeout("sparkle()", 40);
}
function update_star(i) {
if (--starv[i]==25) star[i].style.clip="rect(1px, 4px, 4px, 1px)";
if (starv[i]) {
stary[i]+=1+Math.random()*3;
if (stary[i]<shigh+sdown) {
star[i].style.top=stary[i]+"px";
starx[i]+=(i%5-2)/5;
star[i].style.left=starx[i]+"px";
}
else {
star[i].style.visibility="hidden";
starv[i]=0;
return;
}

}
else {
tinyv[i]=50;
tiny[i].style.top=(tinyy[i]=stary[i])+"px";
tiny[i].style.left=(tinyx[i]=starx[i])+"px";
tiny[i].style.width="2px";
tiny[i].style.height="2px";
star[i].style.visibility="hidden";
tiny[i].style.visibility="visible"
}
}
function update_tiny(i) {
if (--tinyv[i]==25) {
tiny[i].style.width="1px";
tiny[i].style.height="1px";
}
if (tinyv[i]) {
tinyy[i]+=1+Math.random()*3;
if (tinyy[i]<shigh+sdown) {
tiny[i].style.top=tinyy[i]+"px";
tinyx[i]+=(i%5-2)/5;
tiny[i].style.left=tinyx[i]+"px";
}
else {


tiny[i].style.visibility="hidden";
tinyv[i]=0;
return;
}
}
else tiny[i].style.visibility="hidden";
}
document.onmousemove=mouse;
function mouse(e) {
set_scroll();
y=(e)?e.pageY:event.y+sdown;
x=(e)?e.pageX:event.x+sleft;
}
function set_scroll() {
if (typeof(self.pageYOffset)=="number") {
sdown=self.pageYOffset;
sleft=self.pageXOffset;
}
else if (document.body.scrollTop || document.body.scrollLeft) {
sdown=document.body.scrollTop;
sleft=document.body.scrollLeft;
}
else if (document.documentElement && (document.documentElement.scrollTop || document.documentElement.scrollLeft)) {
sleft=document.documentElement.scrollLeft;
sdown=document.documentElement.scrollTop;
}
else {
sdown=0;
sleft=0;
}
}
window.onresize=set_width;
function set_width() {
if (typeof(self.innerWidth)=="number") {
swide=self.innerWidth;
shigh=self.innerHeight;
}
else if (document.documentElement && document.documentElement.clientWidth) {
swide=document.documentElement.clientWidth;
shigh=document.documentElement.clientHeight;
}
else if (document.body.clientWidth) {
swide=document.body.clientWidth;
shigh=document.body.clientHeight;
}
}
function createDiv(height, width) {
var div=document.createElement("div");
div.style.position="absolute";
div.style.height=height+"px";
div.style.width=width+"px";
div.style.overflow="hidden";
div.style.backgroundColor=colour;
return (div);
}
// ]]>
</script>

Now click Save

 you can change :

Followers

Blogumulus by Roy Tanck and Amanda Fazani
Free Blogger Tips, Hacks, Widgets, Templates and more