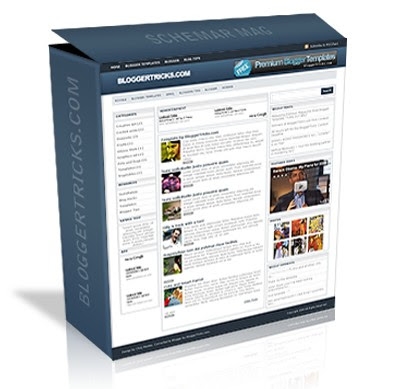
As usual, this is a wordpress to blogger conversion.. wp theme by Chiq Montes of wpthemedesigner.com and converted to Blogger by me.
look at the screenshot:

Special Features:
» Thumbnails on articles (automatic resize)
» Google Adsense/banner ready
» 3 Columns
» SEO Optimized
» Featured video
» Read more..(automatic summarize)
Step by Step Installation guide:
Step 0: First , follow the basic installation steps here.
Step 1 : Editing top Navigation links
1.a :

Go to Layout » Edit html and find this code
<li><a expr:href='data:blog.homepageUrl'>Home</a></li>


<li><a href='http://bloggertricks.com'>Blogger Templates</a></li>


<li><a href='http://blogger.com'>Blogger</a></li>


<li><a href='http://bloggertricks.com'>Blog Tips</a></li>
and Replace the Anchor text (Blogger Templates,Blogger,Blogtips) and their respective links to your needs.
1.b:

and again, there's another navigation bar..
Find this code
<li class='f'><a href='http://google.com'>Google</a></li>


<li><a href='http://bloggertricks.com'>Blogger Templates</a></li>


<li><a href='http://gmail.com'>Gmail</a></li>


<li><a href='http://bloggertricks.com'>Blogging Tips</a></li>


<li><a href='http://blogger.com'>Blogger</a></li>


<li><a href='http://adsense.com'>Adsense</a></li>
and edit the anchor texts,links as you wish.
Step 2: Adding Adsense banners to header and on top of every post
2.a: Adsense on header
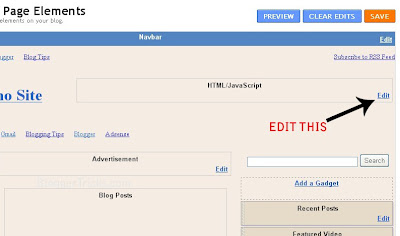
 Just go to Layout and edit the gadget as shown below and paste your adsense code (468 x 60px) and save it..
2.b: Adsense on above first post (even on labels,search pages)

Just go to Layout page and edit the 'advertisement' gadget as shown below

Step 2 : Edit the logo text

The .psd file is included in the template download file. Just open it with photoshop and edit the text and save it as image file (.jpg or .gif). Next , upload to any image hosting servies and copy the image url of the uploaded image.
Next, go to Edit html and replace this image url in the template with the one you just copied now.
http://i43.tinypic.com/er0iyo.jpg


0 comments:
Post a Comment